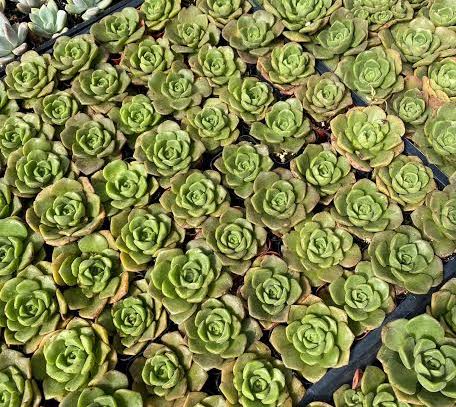
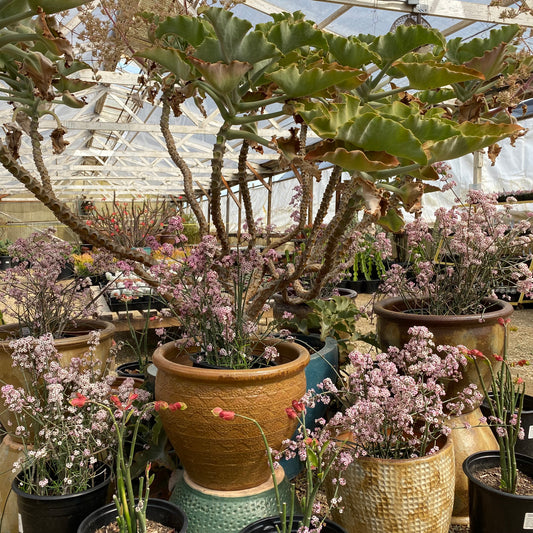
My interest in gardening vertically began in the late 1970’s, when I created a redwood box for hanging on a wall once planted with succulents. I called this a living picture/mural. That interest has grown over the past several years, with ambitious projects such as the now famous “Cube” for the Organic Mechanics’ gold-medal winning display at the 2010 San Francisco Flower & Garden Show.

photo courtesy of the SF Flower & Garden Show
For this project I designed and created a 144-square-foot mural that wrapped around four 12’x12’ walls. Each wall used 49 20”x20” square plastic panels, each with 45 slanted pockets. 196 panels in all. Two 2” potted plants went into each pocket, making 90 plants per panel, about 4,400 plants per wall, or a little under 18,000 plants for the entire project. We planted the panels months before the show. (Here is Sean Stout of Organic Mechanics posing with a panel, in front of the “Cube” mural laid out in our greenhouse).

Having trialed and reviewed a number of different container systems designed for vertical gardening, I’ve determined that the best panels for what I do with succulents are the plastic panels originally designed by Greg Garner of ELT Living Walls and since modified into other sizes and configurations by Greg and Bright Green USA.
In addition to the 20”x20” panel I have also been trialing two new plastic panels, the 12”x12” and the more recent 8”x16”. These two panels are about one inch deeper and the pockets are slightly larger than the 20”x20” panel. Some of the succulents seem to appreciate the added soil volume provided by the deeper, larger pockets.

This panel was also used to produce the “Dovecote” for the Filoli/Garden Route display at the 2011 San Francisco Flower & Garden Show, and more recently on a gazebo that made its debut at Sunset Celebration, and is currently on display at our nursery.

We’ve learned a lot about this process over the years. Most important is to think of the panels as containers for living plants; not unchanging architectural features. Like other containers on a patio, you might use them for many years, to house many different types of plants.

All of the plastic panels are mounted in a similar manner by being hung on a bracket that is mounted on the wall. The most important thing about mounting the bracket is to mount it level.

The pockets of the panels are large enough to plant up to a 4” pot size plant in each pocket. For the Cube we used two 2” size plants per pocket for instant fullness, but generally I don’t use potted succulents for vertical designs, preferring to use cuttings in the same fluid manner as my redwood frame plantings. For a 20-inch square panel we use about 200 cuttings.

The 20"x20" panel is designed to water properly when placed in a vertical, hanging position. No additional modification is needed for proper watering.
These panels are designed to be watered by a drip system installed along top panel (one emitter for each vertical column). Water moves down through the panel and exits at the bottom, either into the next panel below, or falling out the bottom. (Drip systems are not included with the panels and must be separately installed). We have successfully watered 5 layers of panels with one drip line of emitters at the top

We are often asked if vertical plantings can be watered by a hose spray from the front. The answer is no, not really. At least not on a large-scale planting. Hand watering is not as effective as drip because it is difficult to hand water at a slow enough rate to achieve even and thorough distribution of water in all the individual pockets. If you want to do a good job watering, install a drip system.

As for watering frequency, the answer to this varies according to a number of different factors such as climate and exposure. As conditions and plant sizes vary, so will the water requirements of the plants. Our panels are typically watered about once each week.

We will discuss maintenance in our next post, but in general we tend to use varieties the do well in shallow soils and do not grow extremely large. When plants get too large, we just pull them out and replant.
We have a complete display of our vertical gardening products that you are welcome to come see for yourself, Tuesday through Saturday, April through October! Also available for purchase on our website.
Posted September 11, 2011
in
Articles, Vertical Gardening

Summer as arrived! Right after Sunset Celebration I took a short trip to San Jose del Cabo, at a surf break called the Rock. We arrived on a Sunday afternoon, and were in the water at 5pm. My first wave of the trip was a disaster when someone lost his board as I was riding by. Three stitches in my shin, two days out of the water and I was good to go. The plants were hanging out back home, as only succulents can do, and didn't suffer in the least while I was away!
So here's what's going on with Succulents this time of year:

Aeoniums are beginning to go to sleep for the summer, particularly in the warmer areas like the central valley, Sacramento and the deeper coastal valleys like Carmel Valley. Don't be surprised if some of your Aeonium's begin to defoliate as summer progresses. This is not a very good time to be pruning Aeoniums.
Echeverias have already begun blooming and more will follow. Watch for aphids on the flower buds. If you see the bugs, wash them off, or use bug spray. If you use bug spray on the Echeveria and some of the chemical collects in the center of the rosette, be sure to go back and rinse the chemical out to avoid chemical burn. Some people just prune the flowers to get rid of persistent bugs. This is growing time for Echeverias and a good time to do any pruning you might want to do. We will remove the flowers from the Echeveria elegans in a week or so, so the texture of the rosettes in our display beds will be more visible.
When plants are actively growing, it is also a good time to fertilize. I do not recommend any specific fertilizer. I do suggest reducing the dosage recommendation by 1/2 and only fertilizing about once each month. For mixed container plantings that are fully developed, you can reduce the dose by 1/2 again, just providing a maintenance feeding and trying not to encourage too much growth.

Agaves typically grow pretty well in the summer. Growth rates are noticeably increased by regular watering and feeding. Agaves can survive pretty well without water and feeding once they are established, but their growth will slow considerably and they may also get burned leaf tips. This is a good time to prune the lower leaves of the Agaves that you want to clean up. Plants that were damaged by hail this past winter can have their lower leaves removed now. Remember to protect your skin from the Agave juice which can be a bit caustic. Using a serrated blade, or sharp pruning saw usually works better than clippers to cut the fibrous leaves
Crassulas and Cotyledons are mostly growing in the summer and are also good candidates at this time of year for feeding, watering, pruning, and propagation.
Many of the Aloes are finished blooming and some may have big flower stalks loaded with seeds after the humming birds have been out there pollinating. Collect some seed and try growing some. If the flower stalks are completely dry, you can hold the stalk and rock it back and forth to remove it from between the leaves. You can also wait for this to occur naturally if you don't want to bother.

Sempervivums put out many of their offsets in the early to late spring. The offset will continue to grow larger as the year progresses. If the Sempervivum are in hot sun, they will tend to shrivel and the rosettes will often close up until the fall weather cools. I propagate the sempervivum rosettes year around, but take care in the hotter months to shade them for root growth.
Snails and Earwigs are active pests for the next several months. As for the Earwigs, hunt them down and get rid of them. As for the snails, there are some pretty good recipes and summer is a perfect time for a crisp white wine, Sauvignon Blanc, and Escargot. (Here's a recipe we found!)
A number of the Sedum will be blooming now. they are a bit like vegetables that bolt. Many seem to exhaust themselves by shooting up heavy blooms and they become quite spindly. After they finish blooming, pruning to encourage lower branching can be helpful. some varieties will wait until fall to grow back out. They sure are pretty now:


Many of the succulents will be easier to keep looking lush if they are protected from hot summer sun, particularly if they are in containers. Placing containers in the afternoon shade by moving them under eaves, or a tree that's not too messy, can be a good way to do this. A well placed patio umbrella also works. Hope you are all enjoying a fine summer!
Posted June 9, 2011
in
Articles, Latest news, Useful Tips

There is a fair amount of information out there on this very special plant, sometimes referred to as Drakensburg Aloe (or more commonly Spiral Aloe) so I won’t go into all the details. Aloe polyphylla has become more readily available since the advent of tissue culturing difficult-to-propagate plants. Tissue culture is the propagation of plants as “test tube babies” or cloning. For plants that seldom flower, or require many years to reach flowering maturity, tissue culture is used to speed up the process. Plants that might not come true from seed, or are not easy to propagate from cuttings are also good candidates for tissue culture.

I have had the good fortune to work with Alan Beverly, http://www.ecotree.net, an expert in the understanding of this plant. Alan brought seed from South Africa for Aloe polyphylla many years ago, before this plant made the endangered species list, and has produced numerous seed crops over the years.

When tissue cultured plants began to appear in the market place, I had this idea that I would buy plants from several different labs. I would then grow the plants to maturity, along with seedlings I had purchased from Alan and then cross pollinate the different plants to produce seedlings of my own. I now have several hundred plants approaching maturity and hope to have flowers in the next year or two; then the fun can begin!

What I did not anticipate is how different the tissue cultured plants would be compared to the seed-grown plants. Aloe polyphylla from seed develops a more defined spiral form at a much younger age. My conclusion, after watching these plants for about six years: if given the option, buy the seed propagated plants.
We just purchased over one hundred of Alan’s seedlings to offer for sale at Succulent Gardens. There are both left and right spirals. When you buy this plant, know which you are buying, because the wow-factor is quite different between seedlings and tissue cultured plants. I am told by one reputable grower that in the long run, the tissue cultured plants will fully develop. I just don’t know how long that run is.
Posted April 28, 2011
in
Articles, Plant Profiles

One of my goals when creating our nursery in Castroville was to build an inventory that gives me lots of flexibility when designing and installing succulent landscapes and container gardens. Availability of material is critical to the realization of any landscape project. Whether creating my own design, or working with a professional who needs material for their own project, availability of desired varieties in sizes and numbers necessary, is critical to any project’s success.

The nursery industry has developed over the years as an efficient backup to the retail nurseries and landscape professionals who use plants in their inventories and projects. Succulents have not been available in the supply chain in sufficient variety or volume, nor has there been a demand until recently, to make landscaping with succulents practical. One of the goals at Succulent Gardens has been to build an inventory that would satisfy the needs of both variety and volume.
San Francisco Flower & Garden Show


The “Cube” I designed for the 2010 San Francisco Flower & Garden Show (with Organic Mechanics of San Francisco) used 20,000 plants, all in liner size.
Villa Mundo

A Los Gatos landscape designed by Jarrod Baumann and installed under the inscrutable eye of Jim Everett, used about 2,000 Echeveria elegans below the serpentine wall, mature Aloe saponaria/striata hybrids in 5-gallon cans (in bud) above another wall, and numerous Agave weberi, nova, and franziosinii from 15-gallon sizes up to 10-foot wide specimens.

Neither of these projects would have been possible without the supply, and the supply would not have been available just a few years ago. Today designers and contractors can hand-pick every succulent for their project at our nursery, or have them delivered to the site. You design it, we’ll supply it!
Posted February 21, 2011
in
Latest news
By Robin Stockwell
In order to garden successfully with plants growing on a wall, it is important to recognize the difference from traditional gardening. I never thought about gardening on the ground or in pots as gardening horizontally, but that is exactly what you are doing. Of course there are variations in the slope, but by and large, traditional gardening has been horizontal. Succulent plants are often found growing on cliffs in the crevices of rocks or on the cliff edges, clinging to what soil they can find purchase in. This ability to eke out a living in little soil makes them pretty good candidates for vertical gardening.
To accommodate plants growing on a wall, it is necessary to decide what kind of container would work best for the type of plants being used and for the structure the containers are being grown on. I have settled on two types of containers for vertical gardening with succulents. The first is a frame I developed in the early 1980’s. The frame is built like a picture frame with a wire mesh front.

This frame is designed for smaller applications where the individual frame is not built larger than about 18” x 24”. Once you exceed that size, the frame becomes awkward and needs quite a bit of modification to prevent things like soil slump. The most common sizes I have used in this type frame are 6x12, 12x12, 12x18, and 18x24. The depth of each of these is about 2”. Placing a grouping of these frames on a wall can solve the problem of attractively filling a larger wall space. These frames are low tech and do not incorporate watering systems, so they must be removed from the wall or hung on a hinge system to make it possible to flatten each frame for watering. The frames can be modified to accept a drip system, especially with today’s wide array of drip materials available.
The other system I use is a plastic panel 19.5”x19.5”x2.5”, specifically designed for vertical gardening. This is the high tech system, which is designed to accept drip and is scalable to whatever size is desirable. Each panel has 45 slanted pockets that allow water to flow from pocket to pocket. This frame anticipates some of the issues for vertical gardening on a large scale. Some of the primary issues would include uniform watering, soil slump, ease of mounting and ease of removal.
There are some differences and similarities when gardening with each of these types of frames, or systems. The following is an attempt to describe each system and how to use them from planting to hanging and maintenance.
Gardening with Robin’s Living Picture frame
This style of frame is, planted with cuttings only. Because of the wire mesh front, rooted plants cannot be fit into the planting area. The idea is to fill the frame with succulent mix through the wire mesh.

Place succulent mix over screen in small amounts and gently move through screen by running your fingers over the screen and soil.

The tools. Clippers and a nail will work just as well. The fork or nail can also be used when a stem is difficult to push into the soil. Gently push the fork into the area where you want to insert the stem and it will make it easier to insert it into the hole. This is only necessary when the stem will not push in.

Using a fork or nail, carefully raise the screen to allow soil to fall through the screen. Pulling up too hard can result in pulling the screen out of the frame - be careful. While holding the screen up, use the other hand to repeat the process of moving the soil through the screen.
Once the frame is full, cuttings are placed on the top of the mesh. As roots form, they move into the soil behind the wire. Once fully rooted, the soil is held in place by the network of roots behind the wire. If properly planted, the plants cover the entire surface of the wire mesh, preventing soil erosion.
There are many varieties of succulents that work well in my living pictures. Historically, I have worked with rosettes 90% of the time, throwing in a few sedums and crassulas here and there. Now I like to work with many other varieties to create other looks.
Once a frame has been chosen, it is time to decide what varieties of succulents are to be used. If using rosettes, it will probably take about 130 cuttings to fill the frame. Larger rosettes will reduce the number required, but remember the wire mesh is ½ inch in diameter, limiting the size of stem that will fit through the mesh. I’ve cut the mesh to accept a larger stem when necessary, but mostly work with plant sizes that fit in the mesh.
Preparing Cuttings
Cuttings are prepared by removing offsets, or stems, of plants like echeveria, sempervivum, sedum and crassula. With rosettes, the diameter might vary from ½” to 2”. The stem is usually cut to ¼” length or smaller. (Rudolf Schulz's book Propagation of Succulent Plants, provides an excellent overview of preparing succulent cuttings).

Cuttings that have been removed from mother plants and still need old leaves to be removed.

Cuttings that have had old leaves removed and are ready for planting.
Prepare enough cuttings to fill the space of the frame to be planted. The cuttings will need to heal, form a scab, for about one week before planting. Store the cuttings in a cool, shaded area in a single layer while healing.
Selecting the varieties
As mentioned earlier. I have mostly worked with rosettes such as Sempervivum and Echeveria. My primary reason for this is their ability to confine themselves to small spaces. Most of this is pretty subjective and I encourage the uninitiated to experiment. It’s pretty difficult to go wrong. I like to work with different colors and textures and there are many options with these two families. Sempervivum arachnoideum contrasts well with Sempervivum calcareum. Echeveria secunda is a great contrast with Echeveria ‘Pearl von Nuremburg’.
Planting and rooting the cuttings
Once the cuttings have been prepared and have healed, it is time to plant. For soil, use a cactus mix. If you need to make your own mix, use a regular potting mix combined with an amendment like perlite, pumice, or crushed lava. The purpose of the amendment is to increase aeration and drainage. The soil should be lightly moist. Screen the soil through the wire mesh until completely full. Settle the soil by gently tapping the frame on the surface it is sitting on. Add more soil if there is space between the soil and the wire mesh. Do not overly pack the soil. Now you are ready to plant.

I begin by placing the cuttings that I think of as the focal points of the planting.

I finish by filling in with the plants that are more numerous. If you look at the lower left corner, you will see a Crassula corymbulosa. There are three cuttings of this. I decided after laying out all my plants to move these to a different location. This is something you can do depending on what looks best to you. In the next photo, you will see the cuttings in a new location.
Lay out the cuttings filling the planting space. A little space between cuttings, 1/8th to ¼”, is about right to be able to hang your frame in about 8 to 12 weeks. Move the cuttings around until you are happy with the way the plants look together. Remember, the plants are a bit dehydrated at this point and will be even more so until they get their roots and begin to take up water. Check for roots in about 7 to 10 days. Some plants root more slowly, so checking a sample of different varieties is recommended. Once roots are showing on all varieties it is time for your first watering.
Watering
The frame does not have any drainage, so water enough to get the soil moist to the bottom, but not soggy. Place the frame in a partial shade/filtered sun, airy environment. It should take about a week to dry out. You can check it much like you would a cake by putting a toothpick in to check moisture level. If in doubt, give it another 2 or 3 days and then water it again. One or two days after the first watering, the plants should look like they are taking the water in with the leaves beginning to fill and look less dehydrated. Now it is just a matter of watering as the soil dries and letting the roots fill the soil in the frame. After about 4 to eight weeks of the roots growing, the plants should be rooted enough that gently tugging does not move the plants. This is referred to as establishing the plants in the container. Once the plants are well established it is time to hang your Living Picture.

In this photo, you can see the cuttings are more vibrant after producing roots and taking in water from their first or second watering.

This is a group of Living Pictures that have been watered for the first time. The cuttings have taken in water through their new roots. You can see the increase in color and that they are less dehydrated.
Where to hang it
This planter has no up or down other than what you might think is up. In other words, you may hang it in whatever direction you want. Some use a picture frame bracket and some hang it on a nail using the edge of the frame. If you are concerned for the wall surface and moisture, then you need to take appropriate measures to protect your wall. Moisture will collect.
The best exposure is filtered sun or partial shade. An eastern exposure is usually sun that has not yet gotten too intense. An overhang, lattice or patio cover, a nearby tree, or some other method of filtering the sun will make it easier to maintain the Living Picture. Too little sun will result in plants stretching for the light and losing their color. Too much sun will make the plants appear to be stressed. Finding the right balance, will allow for the best results.
Maintenance
The Living Picture frame is nothing more than a planter. Of course, it is a very specialized planter, made for hanging on a wall. This is vertical gardening and like any other forms of gardening, you need to attend to your plants needs. Maintenance might include pruning, thinning, or even removing unwanted plants. Again, refer to the Rudolf Schulz book, Care of Succulent Plants, for a more detailed description on maintenance.
Fertilizer
Succulent plants are very efficient and therefore use less water and fertilizer than most other plants. Also, because you are gardening in a very small space, it is best to fertilize minimally to slow the growth of the plants. I recommend using an all purpose water soluble fertilizer. Only fertilize about once a month and reduce the recommended dose to ¼.
Over time the plants are going to grow. At some point, you are possibly going to need to prune, thin, or even replant the frame. Like other plants you may have to replace plants that died, remove infestations of unwanted insects, and take care of any maintenance issues that may arise.
Posted February 12, 2011
in
Articles, Useful Tips, Vertical Gardening